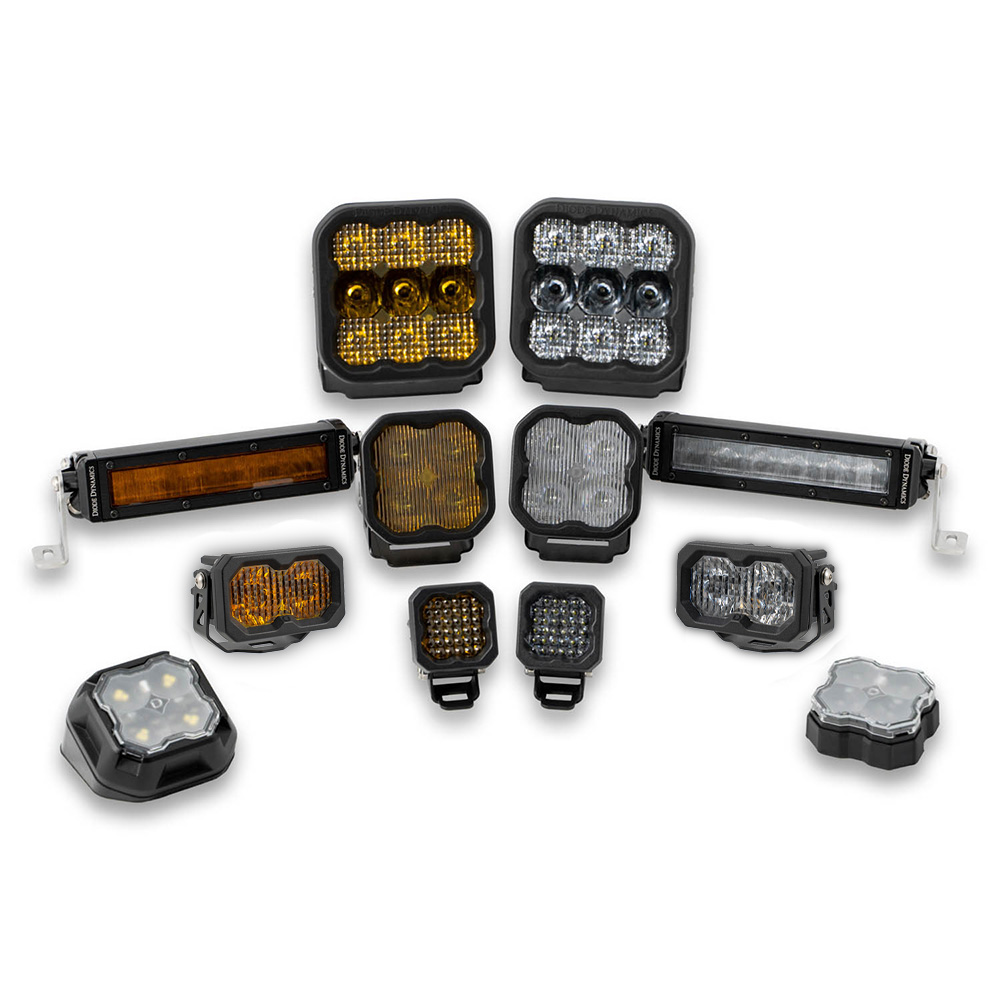


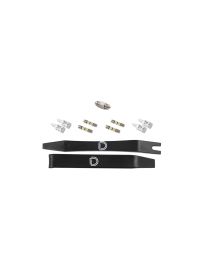
The Stage Series Bed Light Kit for the 2024+ Toyota Tacoma and 2022-2024 Tundra adds an updated look and provides exceptional light output to the bed of your Toyota. The following installation guide will provide you with step-by-step instructions on how to install the Stage Series LED Bed Light Kit for the 2022-2024 Toyota Tundra and 2024+ Tacoma. Check out the installation video and continue reading for step-by-step instructions below!
Table of Contents
Installation Video
Installation Tools
- Pry Tool
- T30 Torx Bit
- 5/32 Allen
- Drill w/ Step Bit
- Flat Head Screwdriver
Installation Instructions
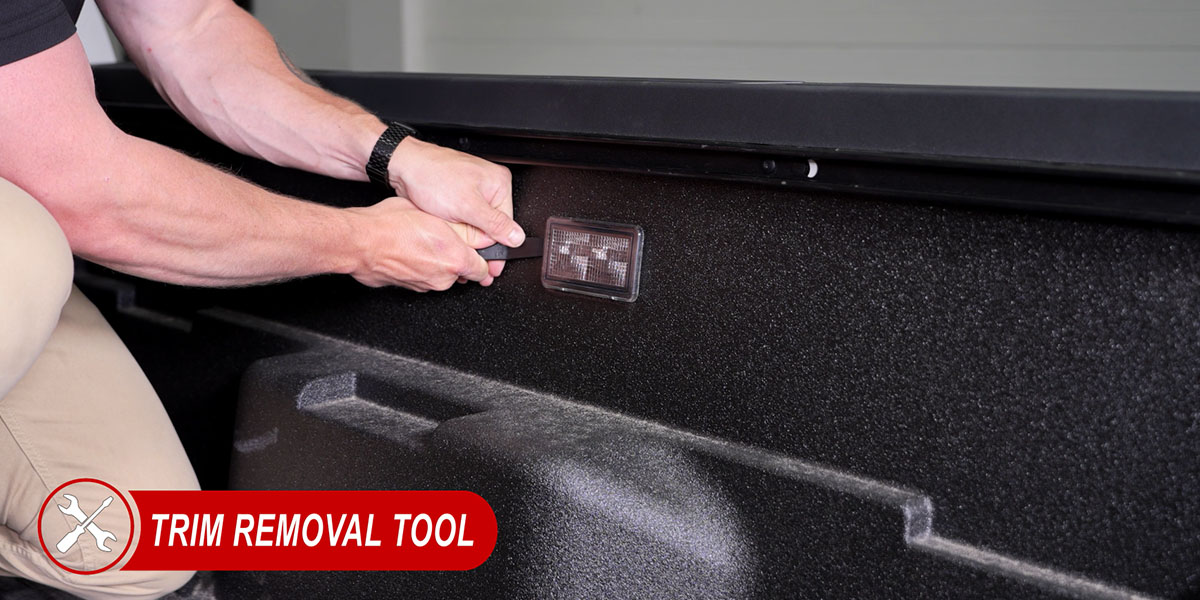
Step 1 - Remove Factory Bed Light
Remove the LH bed light by applying forward pressure and leveraging the assembly outward.
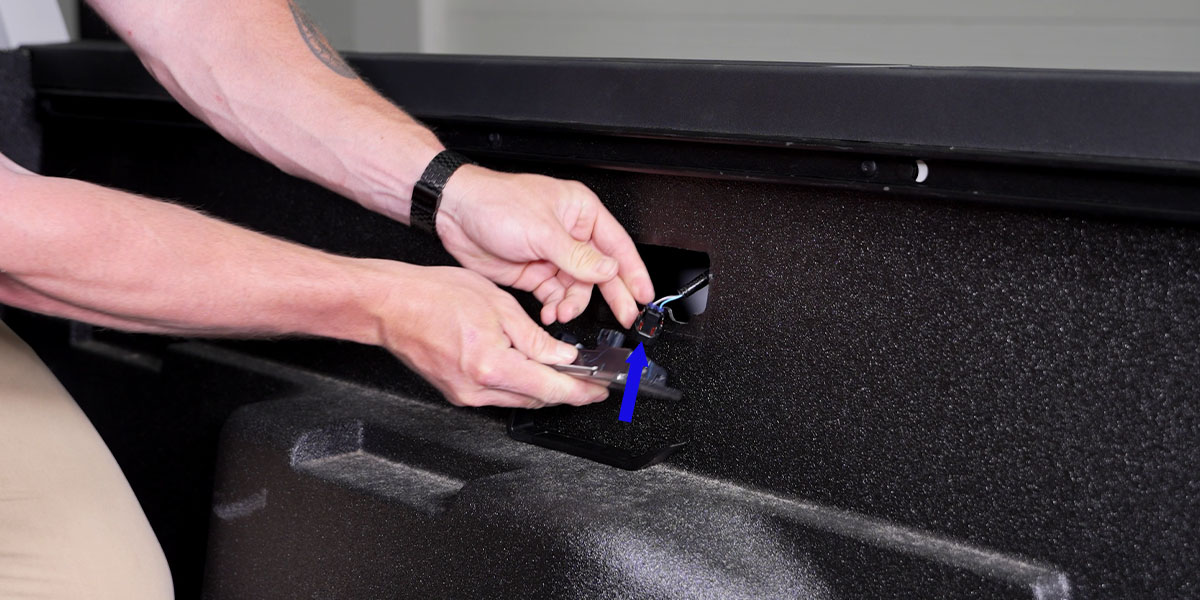
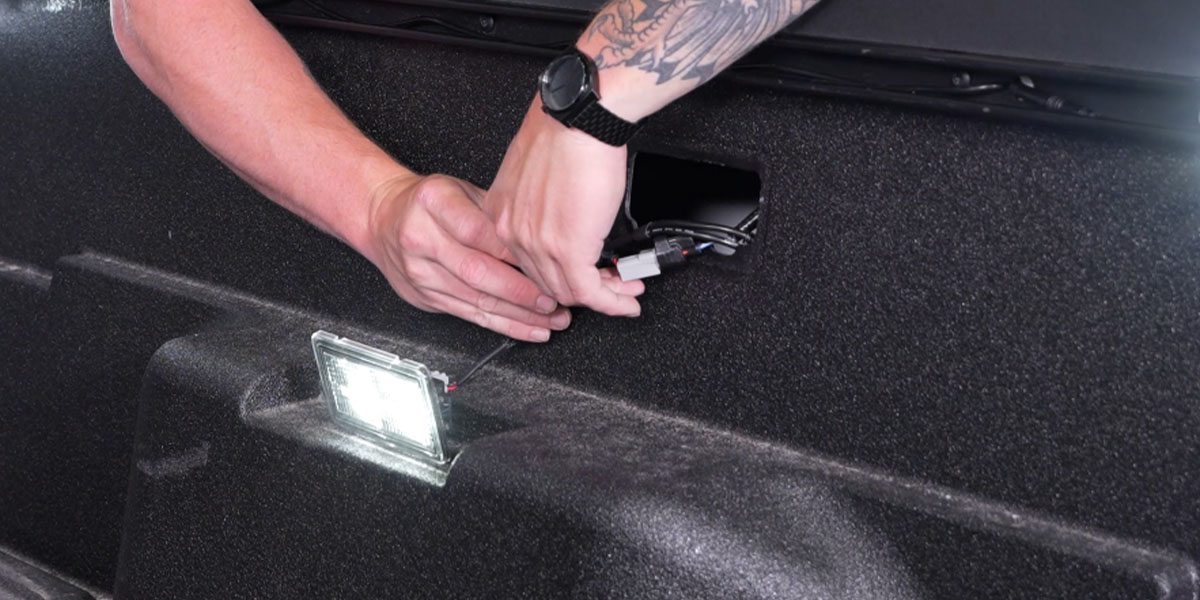
Step 2 - Unplug Harness
Disconnect the assembly from the OE harness by depressing the lock and separating it.
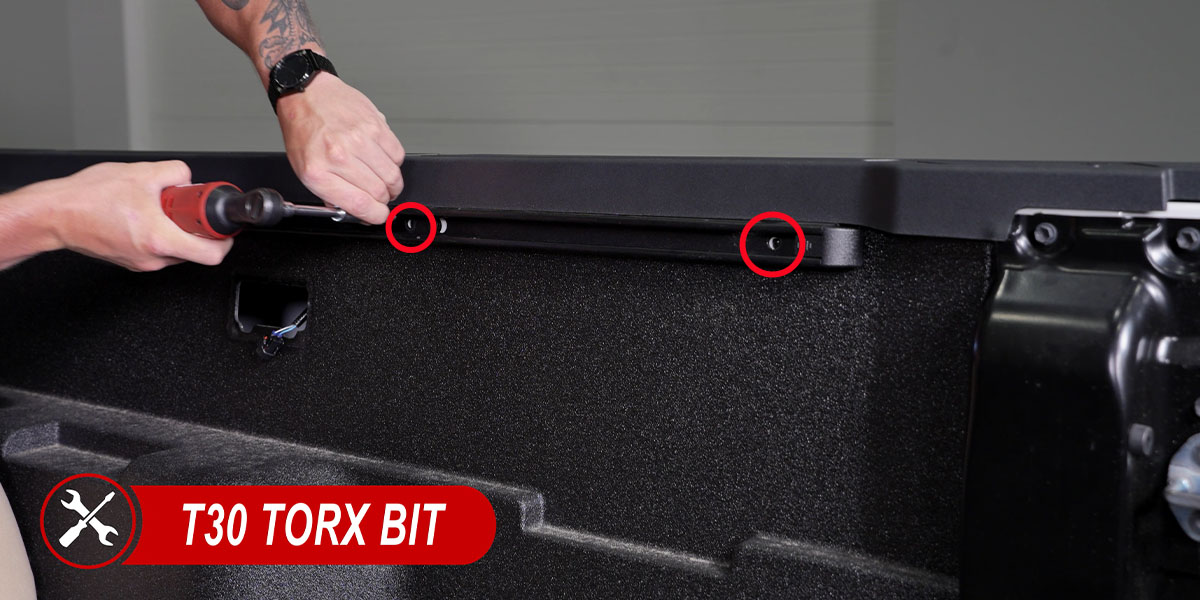
Step 3 - Remove T30 Screws
Use a T30 to remove the (5) five screws holding on the cargo rail (circled in red below).
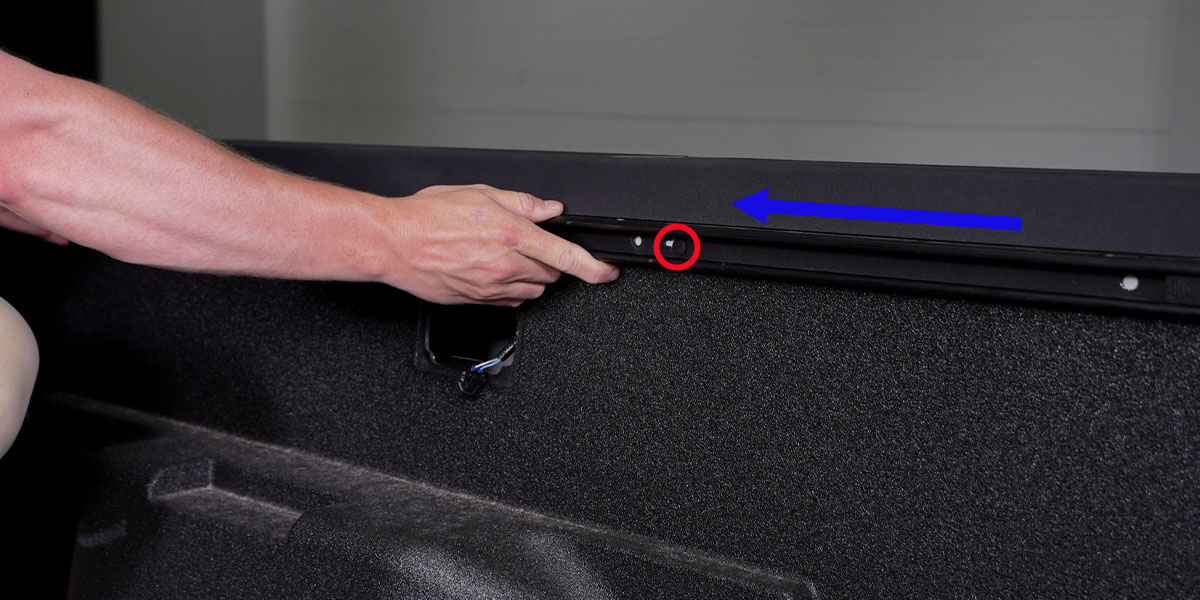
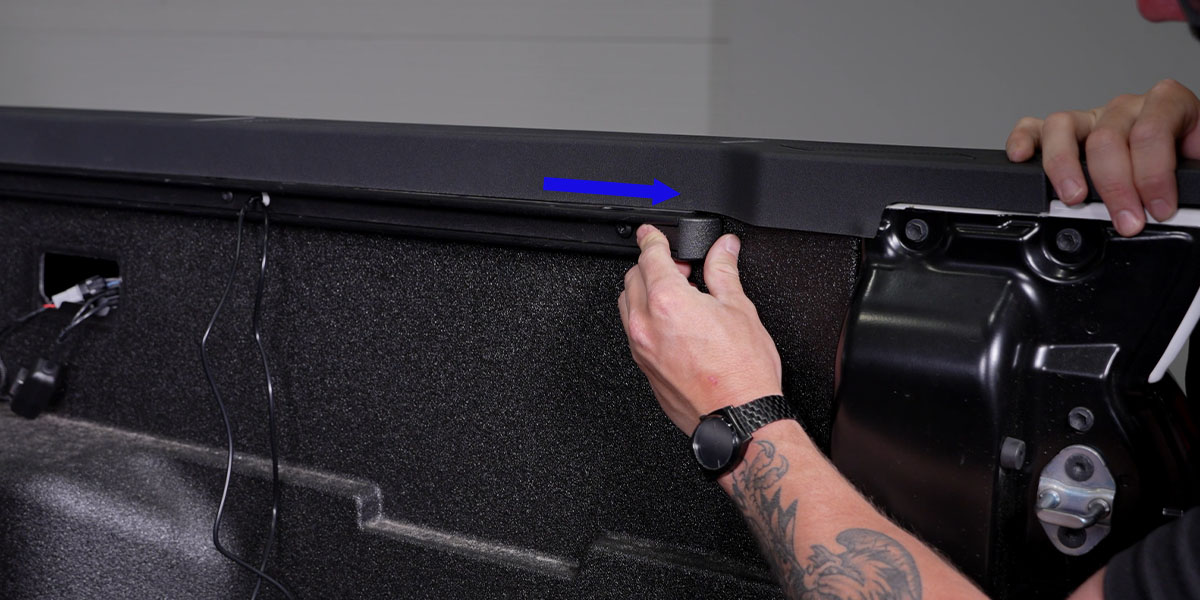
Step 4 - Remove Factory Rail
To completely remove the rail, slide partially forward (indicated by blue arrow) to release from the alignment tab (circled in red below).
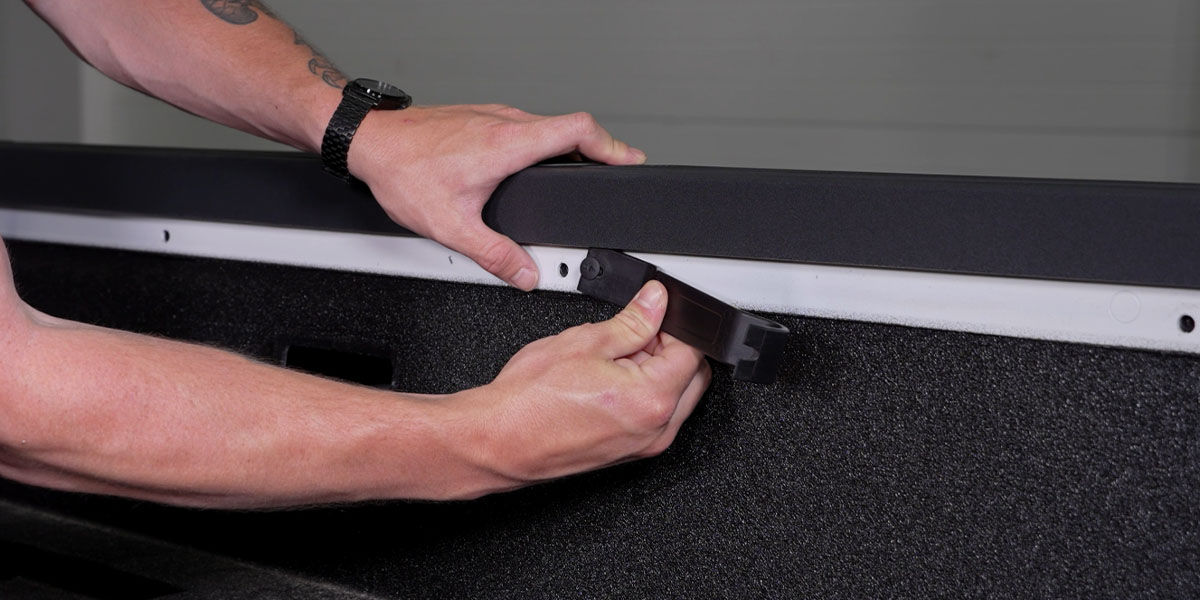
Step 5 - Remove Alignment Tab
Use a pry tool to pull out the alignment tab.
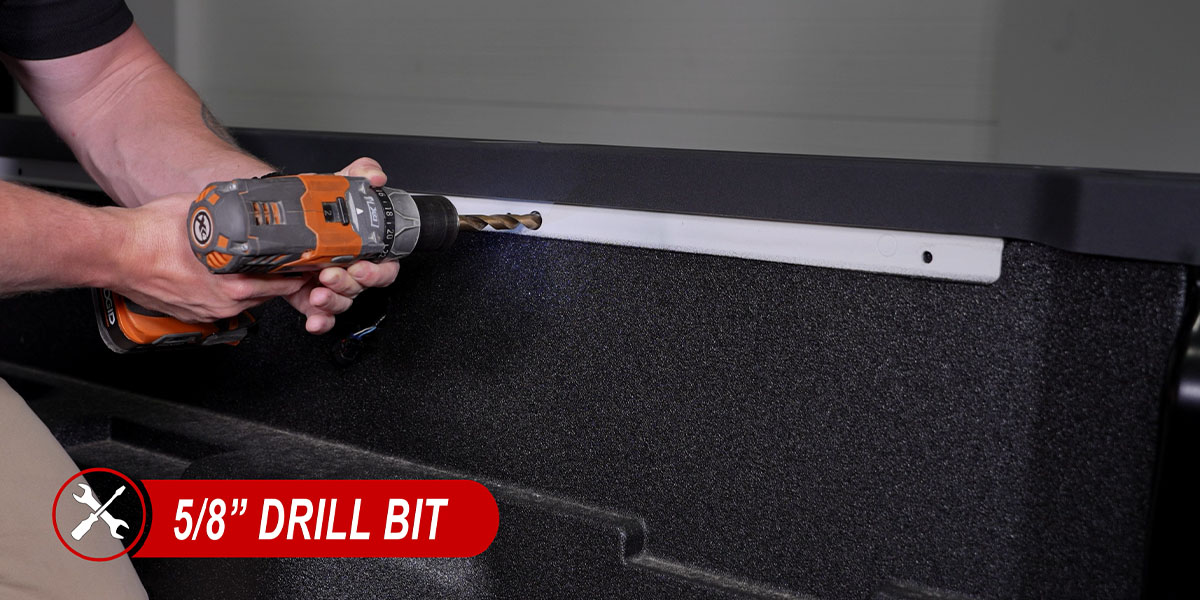
Step 6 - Enlarge Hole to 9/16"
Use a drill with a stepping bit to enlarge the hole to 9/16”.
Step 7 - Repeat on RH Side
Repeat steps 1-6 on the RH side.
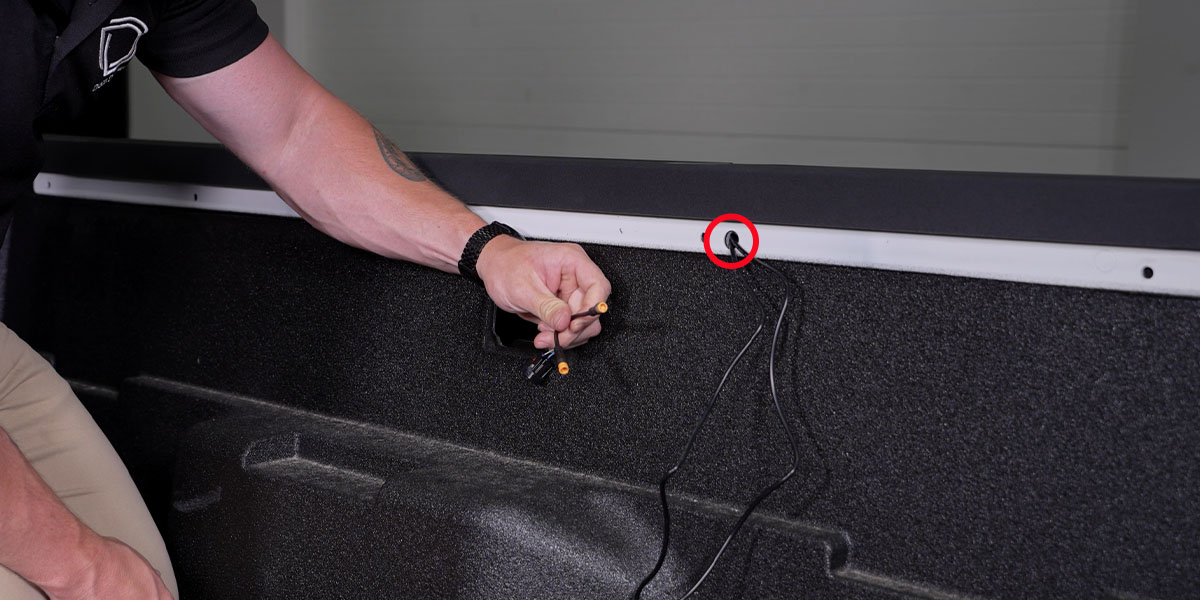
Step 8 - Route Wire Leads
Feed the male side of the (2) two M8 Extension wires through the newly enlarged hole (circled in red below) and out the pocket where the OE cargo light was.
Step 9 - Route Wire Leads Through Rail
Feed the female side of the same (2) two M8 Extension wires through the cargo rail where the alignment tab was (circled in red below).
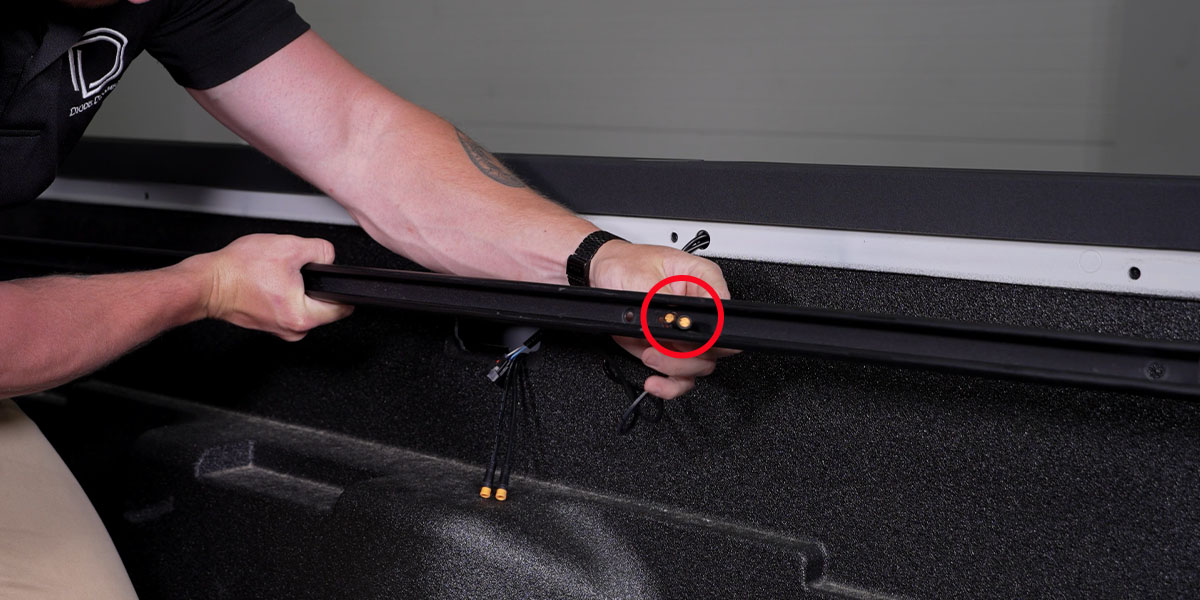
Step 10 - Reinstall Cargo Rail
Using a T30 Torx bit, reinstall the cargo rail using the OE fasteners.

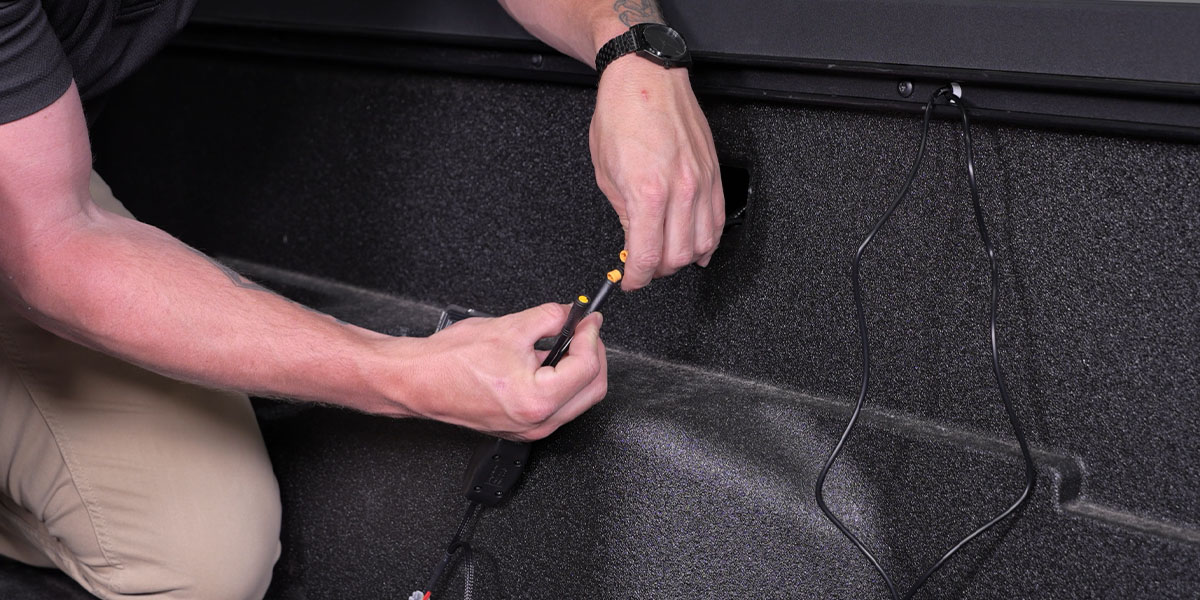
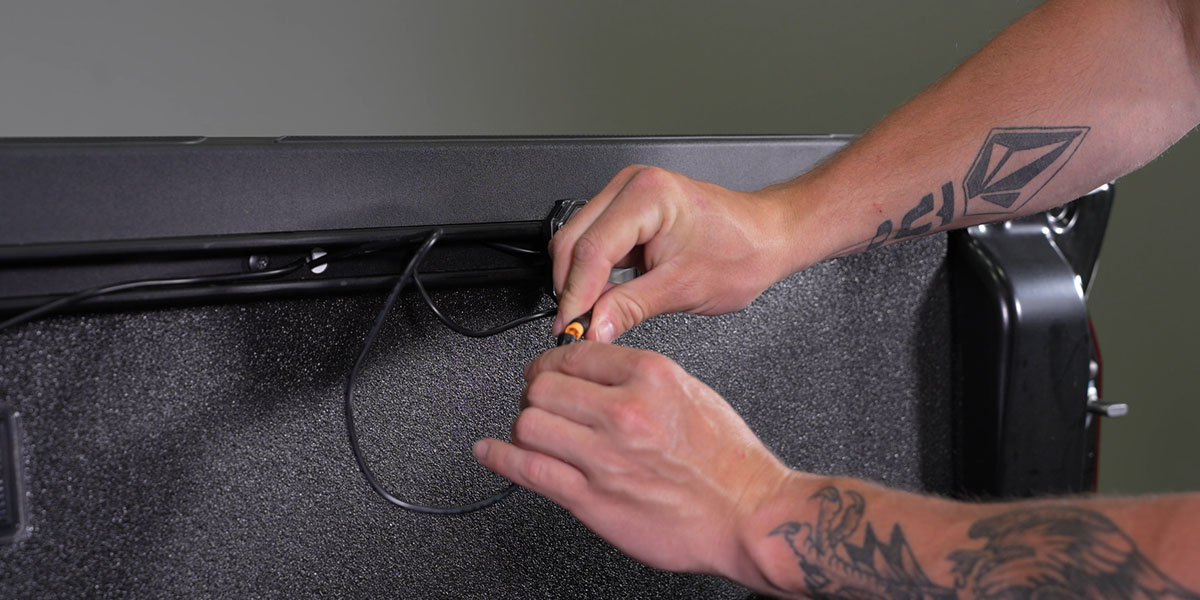
Step 11 - Connect Female Leads to Splitter Harness
Connect the female M8 connectors on the harness to the male plugs on the (2) two extensions by lining up the arrows on each connector and pressing them together.
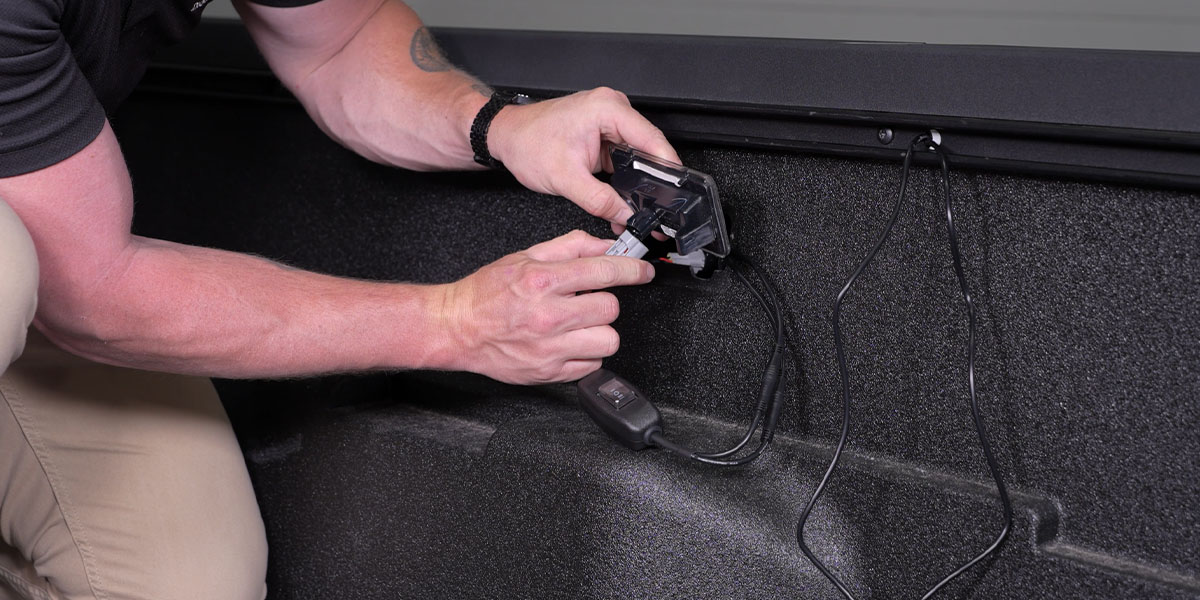
Step 12 - Connect Male 2-pin Connector
Connect the male 2-pin connector on the harness to the OE cargo light connector.

Step 13 - Connect Female 2-pin Connector
Connect the female 2-pin connector on the harness to the OE cargo light assembly.
Step 14 - Configure Brightness
Configure the switch on the harness to the desired power level.
Step 15 - Route Wires into Rail Cavity
Push the harness into the side rail cavity and reinsert the OE bed light. Repeat steps 8–14 on the RH side.
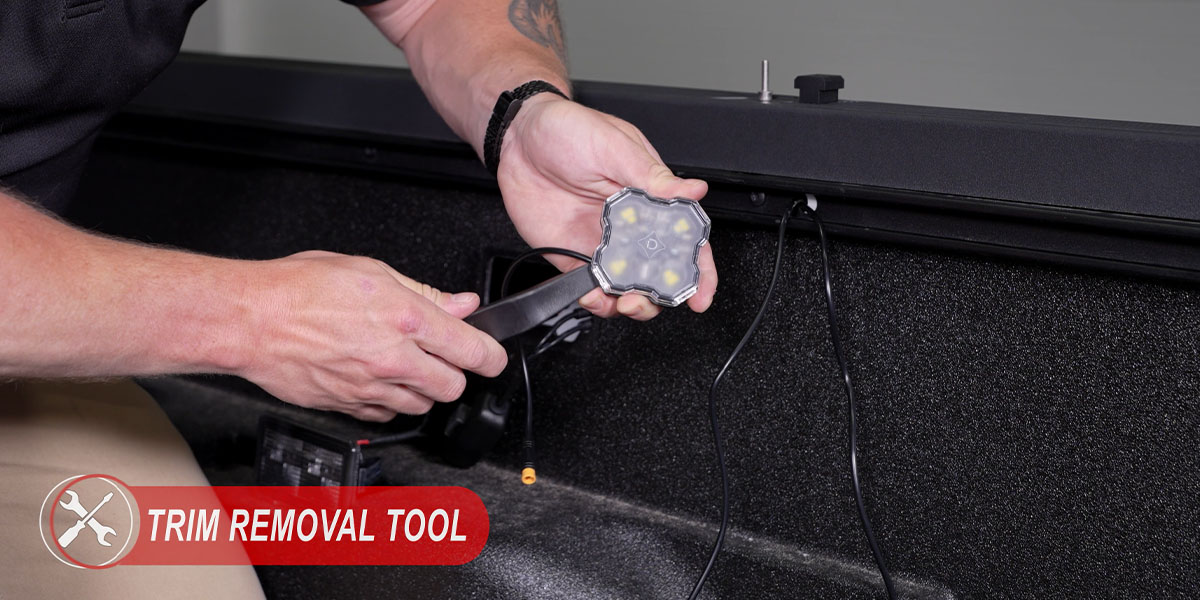
Step 16 - Pry Lens From Rock Light
Use a flathead screwdriver or trim removal tool to pry the lens away from the Rock Light.
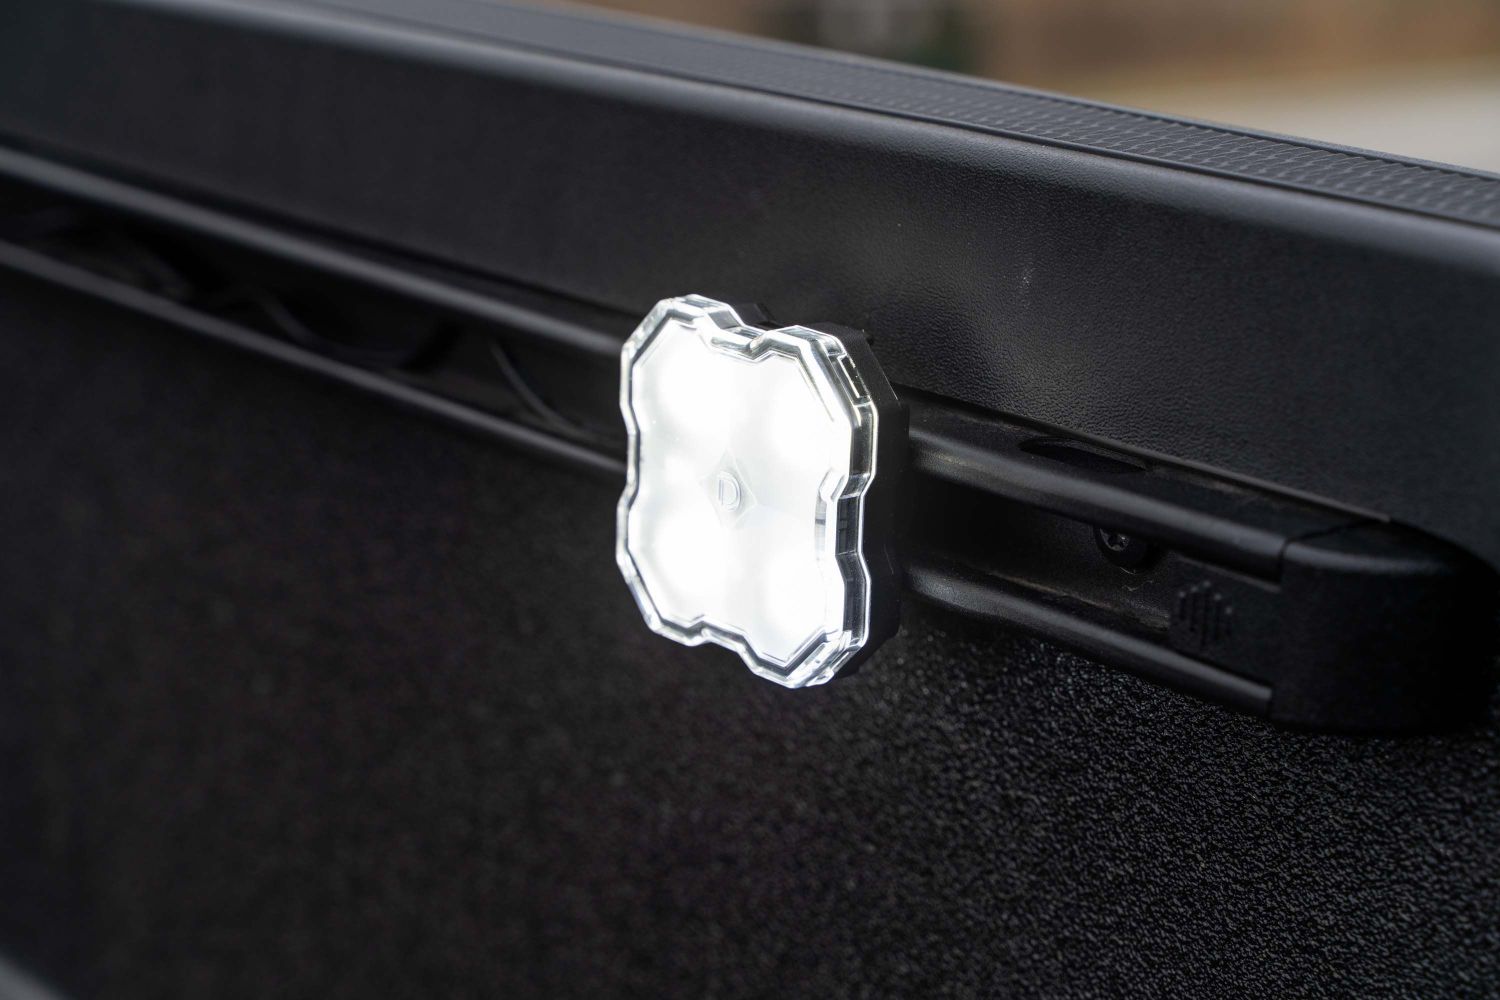
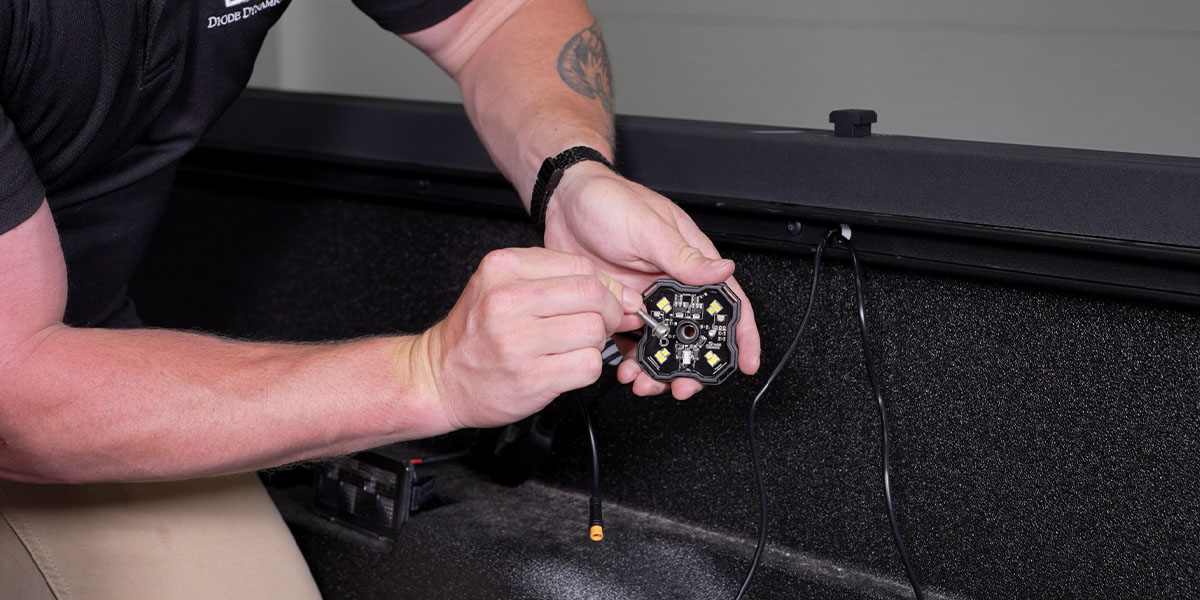
Step 17 - Assemble Rock Lights
Slide the washer onto the screw and then push the screw into the center hole on the Rock Light.
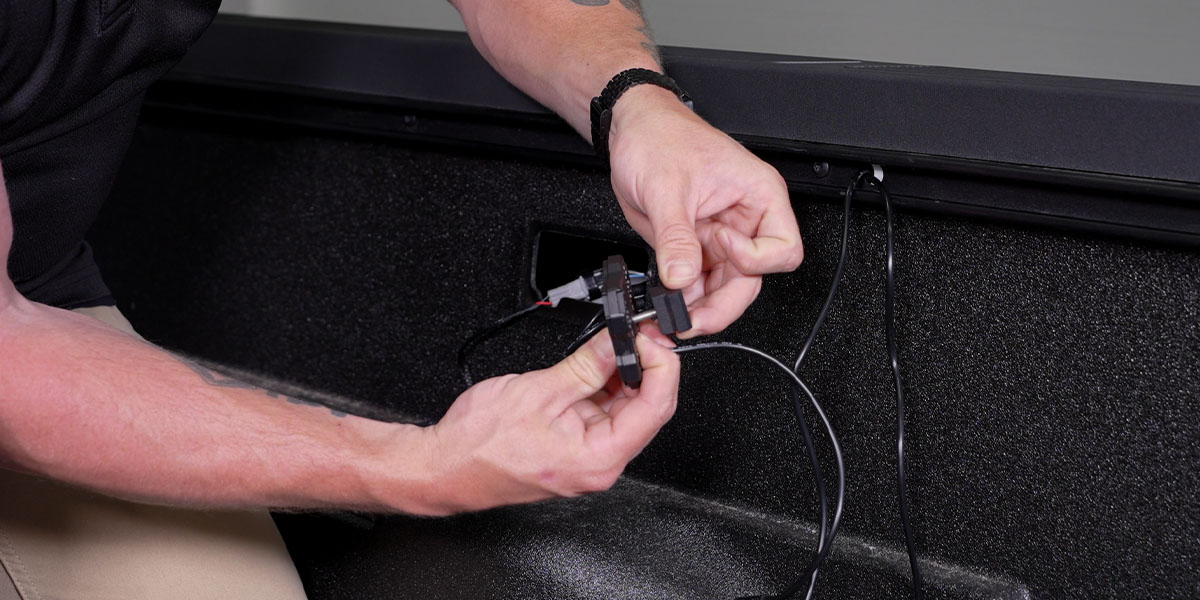
Step 18 - Thread T-slot Onto Screw
Thread the T-slot nut onto the screw. Leave about ½” of space between the Rock Light and the nut.
Step 19 - Repeat Steps
Repeat steps 16–18 for the other three Rock Lights.
Step 20 - Remove Rear End Cap
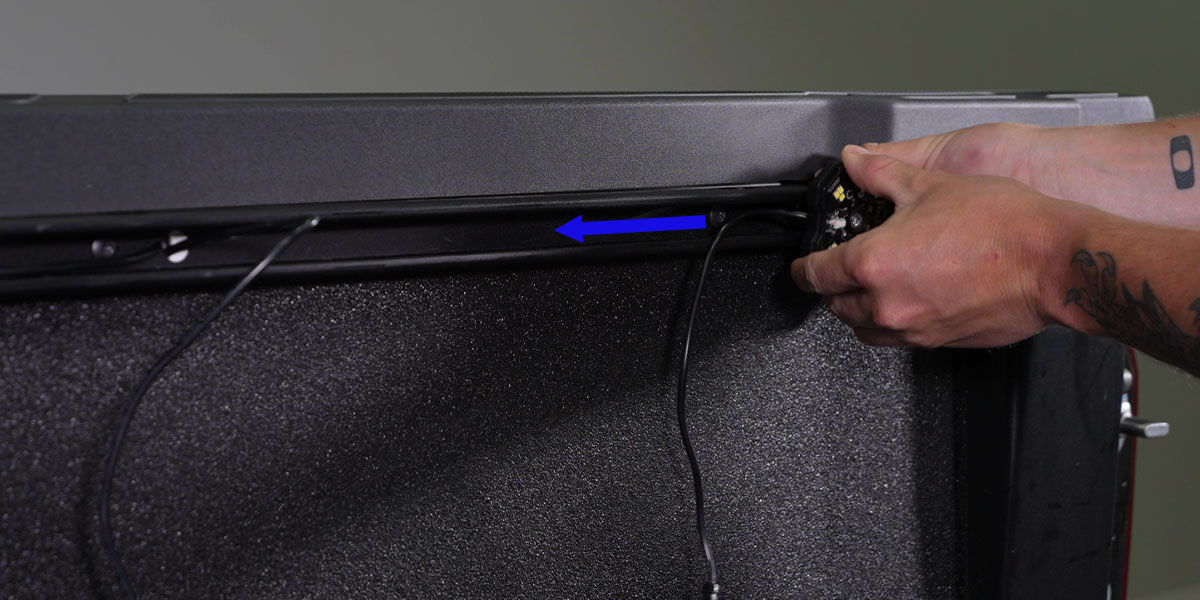
On the LH cargo rail, remove the rear end cap by depressing down and sliding it rearward (blue arrow).
Step 21 - Slide Nut Into Rail
Slide the nut into the cargo rail (blue arrow). Note the orientation, making sure the Rock Light sits outside the rail and that the M8 pigtail is on the side facing OE cargo light.
Step 22 - Locate Desired Position for Mounting
Find a spot on the rail to secure the Rock Light.
Note: Though the cargo rail has notches built-in, the T-slot nut CANNOT sit in or overlap these notches.
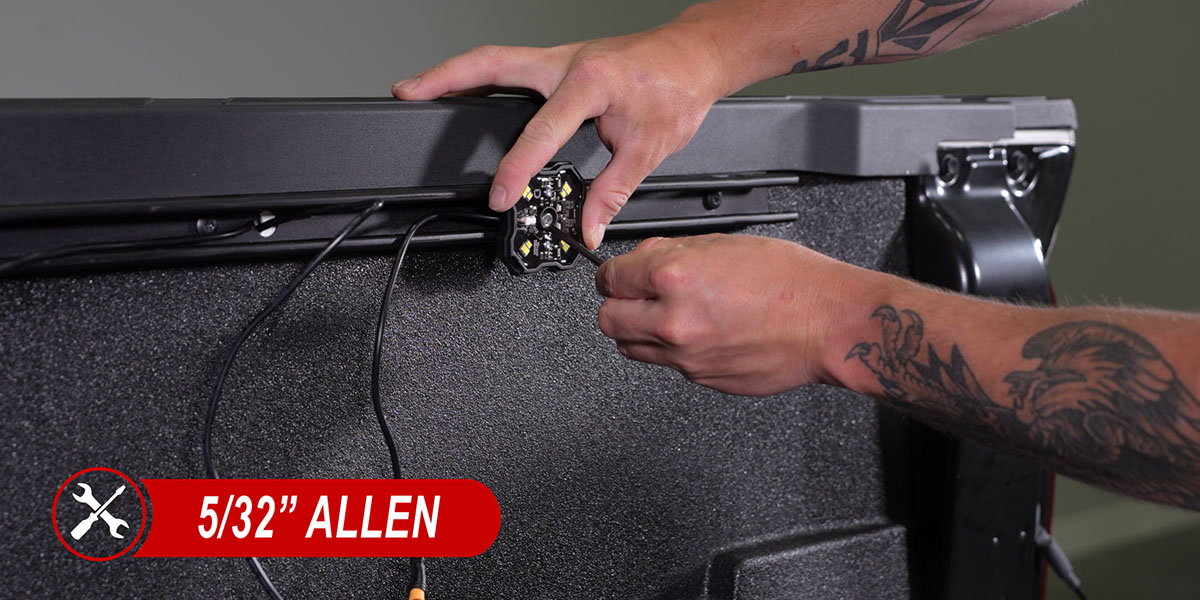
Step 23 - Secure Rock Light
Use a 5/32" Allen to secure the Rock Light.
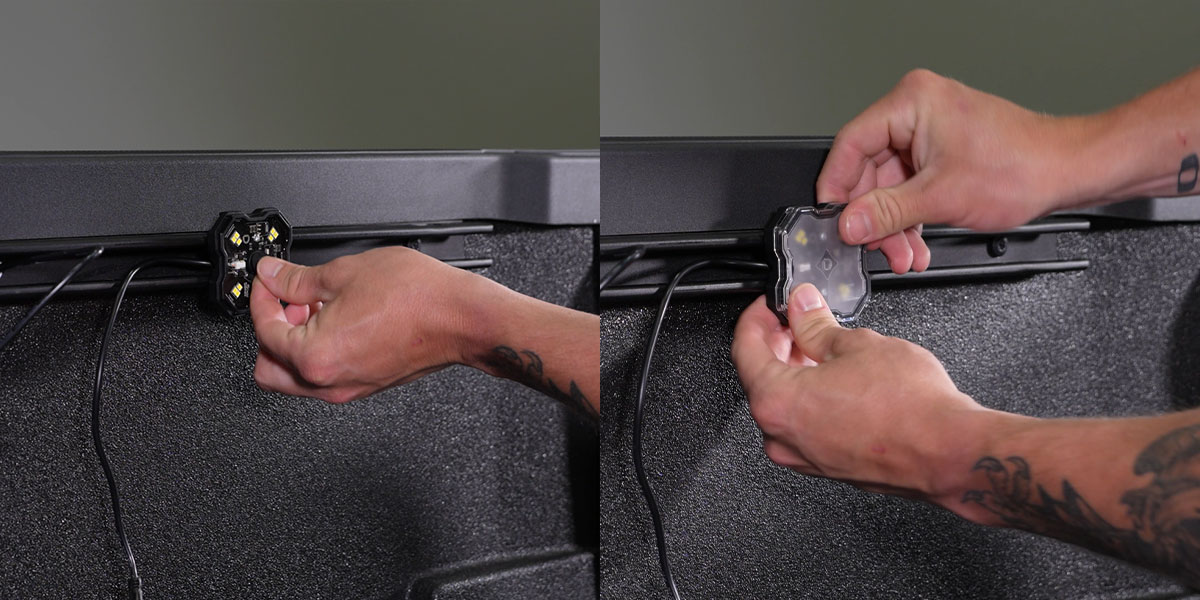
Step 24 - Reassemble Rock Light
Reinsert the rubber seal and outer lens into the Rock Light. Reinstall the end-cap from Step 20 onto the cargo rail.
Step 25 - Connect Rock Light to Harness
Connect the M8 connector on the Rocklight to the female M8 plug on (1) one extension.
Step 26 - Repeat Steps
Repeat Steps 20–25 for the other (3) three Rock Lights installing each on either end of the cargo rails. Tuck the excess extension wires into the bed rail cavity and hide the wires by pushing them into the cargo rail.
Step 27 - Test for Functionality
Test for functionality to ensure everything is working properly.
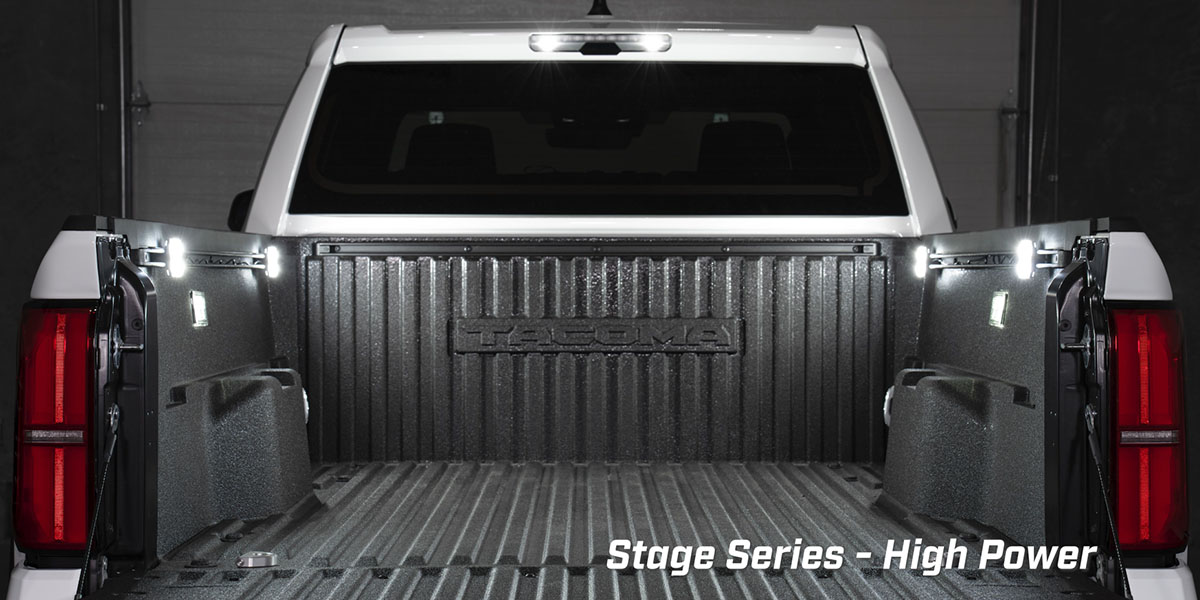
The installation is now complete! Enjoy your new Stage Series Bed Light Kit!
Questions About the Installation?
If you have any questions or issues installing the Stage Series Bed Light Kit for the 2024+ Tacoma and 2022-2024 Tundra, please contact us for further information.
Where Can I Buy a Stage Series LED Bed Light Kit for the 2024+ Toyota Tacoma & 2022-2024 Tundra?
If you're ready to upgrade your 2022-2024 Tundra or 2024+ Tacoma with a Stage Series LED Bed Light Kit, you can purchase one by clicking here or using our dealer locator to find a dealer near you.
Want to know more about Diode Dynamics products? Visit DiodeDynamics.com and subscribe to our newsletter for new product releases and more!
This Installation Guide is for the following SKUs: DD7948

Share This Post