


Introducing our new SSC1 LED Fog Light Kit for the 2023+ Chevy Colorado! This kit allows you to mount two SAE-compliant LED fog lamps in the factory bumper while adding an aggressive, off-road style. The following installation guide will provide you with detailed instructions on how to install the SSC1 LED Fog Light Kit for the 2023+ Chevrolet Colorado. Check out the installation video, or continue reading for step-by-step instructions below!
NOTE: This kit is not compatible with ZR2 trim levels. If your truck is not equipped with factory fog lights, GM fog light bezels must be purchased to complete the installation. These can be found online, or by contacting your local Chevrolet dealership (LH bezel part number: 84770637, RH bezel part number: 84770638).
Table of Contents
Installation Video
Installation Tools
- Trim Removal Tool
- T15 Torx Bit
- 8mm Deep Socket
- 10mm Socket
- 12mm Deep Socket
- Ratchet
- Long Extension
- 4mm Allen Key
- 8mm Wrench
- 13mm Wrench
Installation Instructions
Step 1 - Gain Access to Fog Light Mounts
Using a T15 Torx bit, remove seven (7) bolts from the wheel well.

NOTE: It may be easier to turn the wheels outward to access the bolts.

Next, remove two fasteners securing the inner fender. Depending on your trim, you will either use a T15 Torx bit to remove one (1) bolt and a trim removal tool to remove one (1) push clip, or a trim removal tool to remove two (2) push clips (circled in red below). Repeat on the other side.

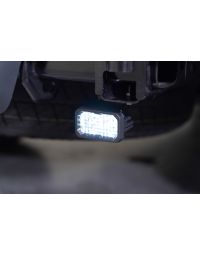
Step 2 - Mount Pods to Brackets
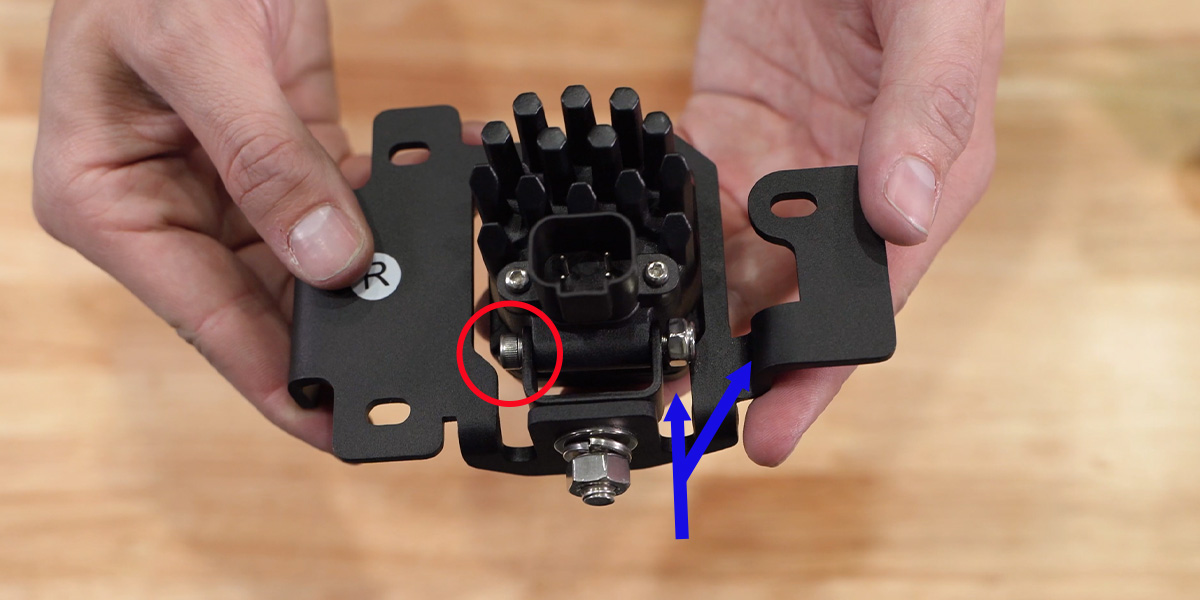
Using the included universal mount hardware, install the SSC1 mount onto the fog bracket in the orientation shown below.

Slide the included flat washer, locking washer, and nut onto the bolt and secure using a 13mm wrench, ensuring the back of the universal mount and fog bracket are parallel.

Insert the SSC1 pod from the front of the bracket and line it up with the U-bracket to mount.
Insert the mounting bolt from the sticker side of the fog bracket (circled in red). Then install the nut onto the other side of the bolt (Blue arrow). Using a 10mm wrench and a 4mm allen key, tighten to secure.
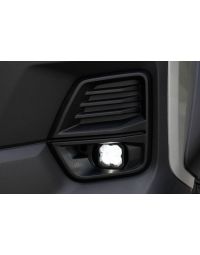
Step 3 - Remove Factory Blank Fog Bezel
On the passenger side, locate the factory fog mounting surface. Through the fog access, push the back of the blank bezel towards the front of the vehicle to remove the blank. Repeat the process on driver's side.

Step 4 - Install SSC1 Fog Light
Preinstall the two (2) included bolts in the orientation shown below. Then install the nylon spacer on the bottom bolt (blue arrow).
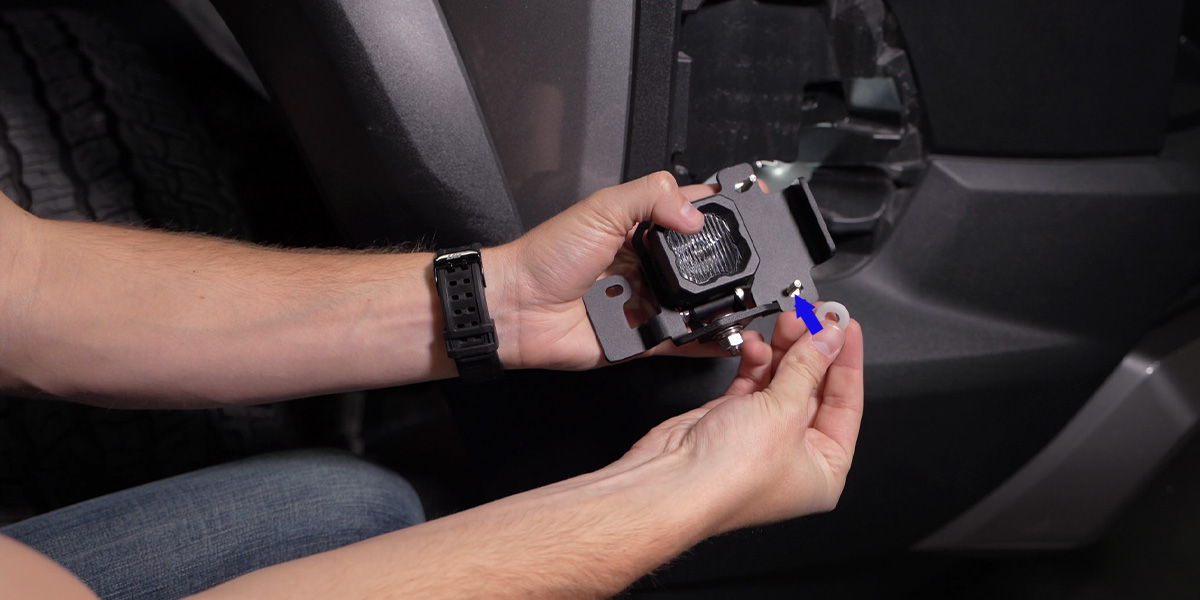
Making sure the spacer stays on the bottom bolt, line up with factory mounting holes, and hold in place while you install the included washer and nut on the front of the bumper.
Install the third bolt in the remaining mounting point, then install the washer and nut. Using an 8mm deep socket, ratchet, and an 8mm wrench, tighten all three (3) bolts until snug. DO NOT OVER TIGHTEN! Repeat on the other side.

Step 5 - Install Purchased Fog Bezel
Line the bezel clips up with the corresponding holes on the bumper. Once all are lined up, push the bezel into the bumper until you hear the clips snap into place. Repeat on the other side.

Wiring Instructions
Step 6 - Routing into Cab
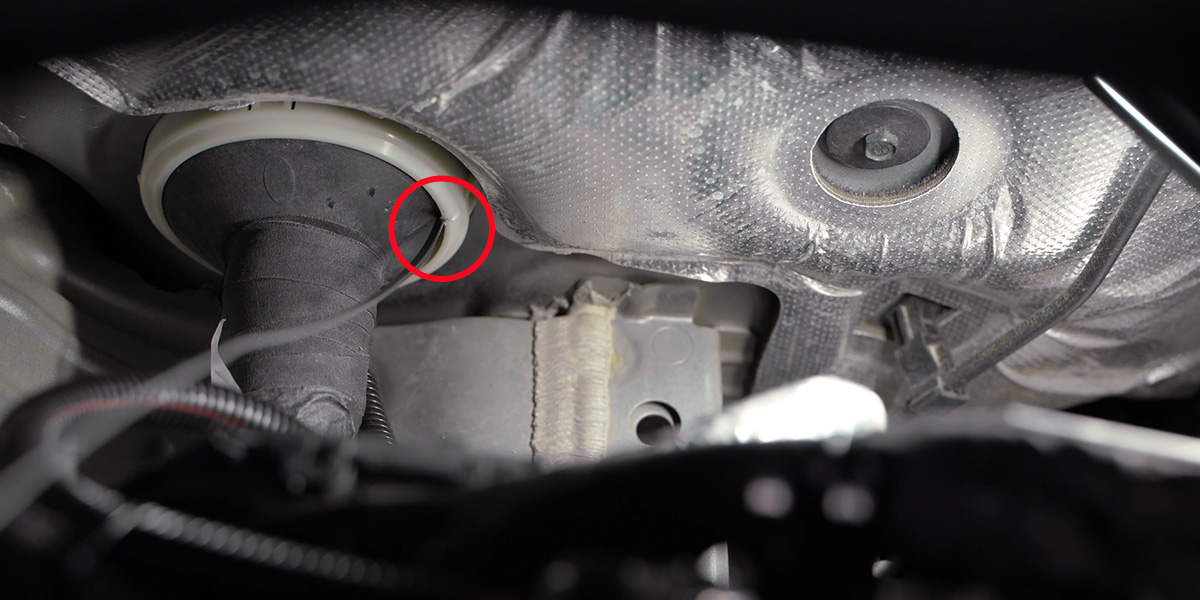
Using a pick tool or razor, poke a hole in the firewall grommet off to the side of the vehicle harness (red circle).
In the cab on the passenger side, use a trim removal tool to remove three (3) tree clips located below the glove box.
Remove the glove box panel by peeling it down from the back until it releases, then peel the top of the carpet back a bit to reveal the firewall access.
Push the grommet to the right and push the two (2) spade connectors on the included switch wiring through the firewall.
Pull the leads pushed through the firewall up into the engine bay. The shorter lead (Switch Input) goes to the battery, and the longer lead (Activation Input) needs to go to the back of the passenger headlight.
From the passenger side floorboard, remove the switch and run the harness under the center console to the driver side through the gap shown below using a wire fisher.
Once the switch leads are pulled through the center console gap to the driver's side, set the black ground wire aside for a future step. Route two (2) leads across the steering column under the dashboard.
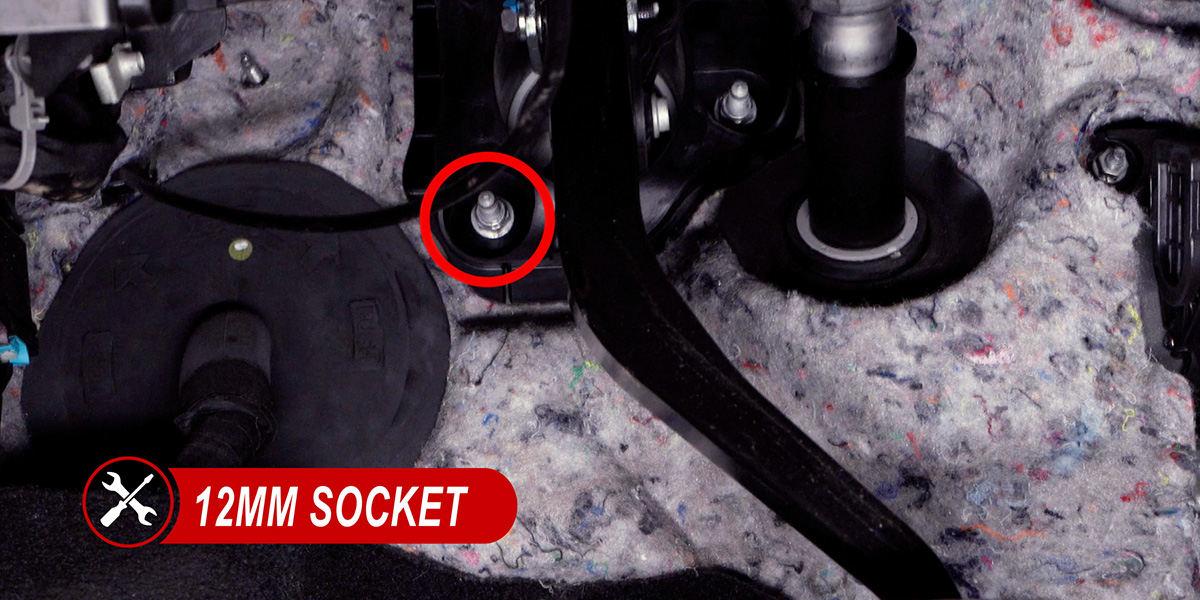
Using a 12mm socket, remove the 12mm nut (circled in red below), install the ring terminal on the black ground wire, and resecure.
Route the black ground wire to the other two leads previously ran and reinstall the switch.
On the passenger side floorboard, tuck the wires run behind the carpet and reinstall the glove box panel with the three (3) tree clips removed earlier.
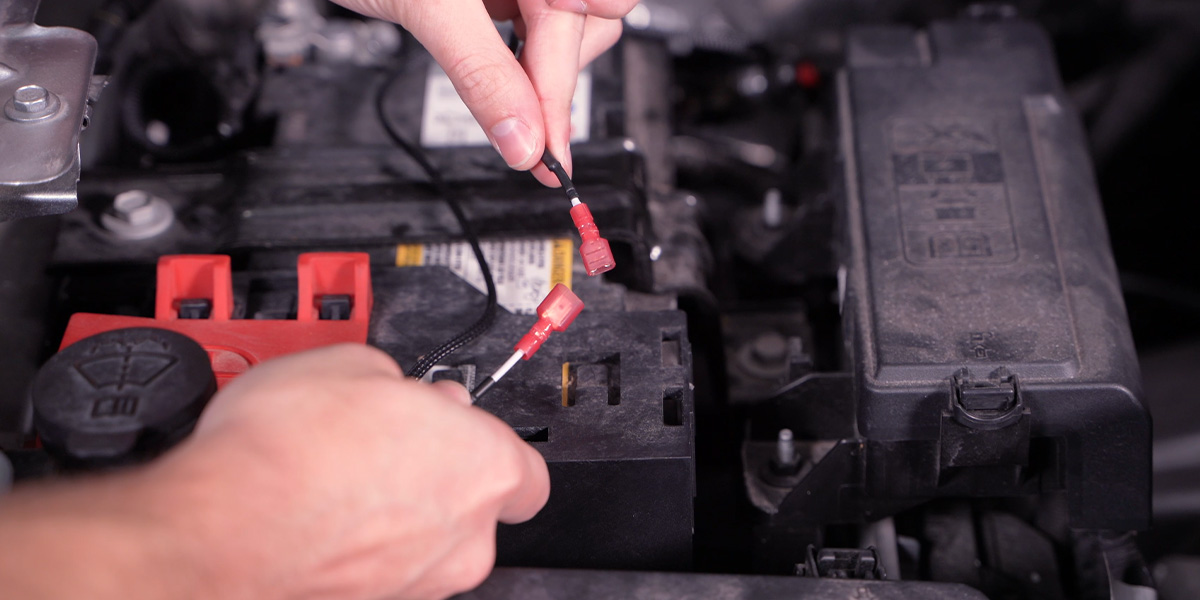
Connect the switch input from the relay to the shorter wire lead that was left by the battery.
Step 7 - Engine Bay Routing
Install the relay behind the battery with wire outputs facing toward the front of the vehicle.
Using a 10mm socket, loosen the negative battery terminal and install the relay ground lead by sliding under the nut and resecuring.
Access the passenger-side headlight connector by moving the fuse box. Using a 10mm socket, extension, and ratchet, remove two (2) nuts shown below.

Locate the locking clip on the back near the battery. Press the locking clip away from the fuse box and lift the assembly to release.
Lift the fuse box up and over the mounting studs and set off to the right of the studs.
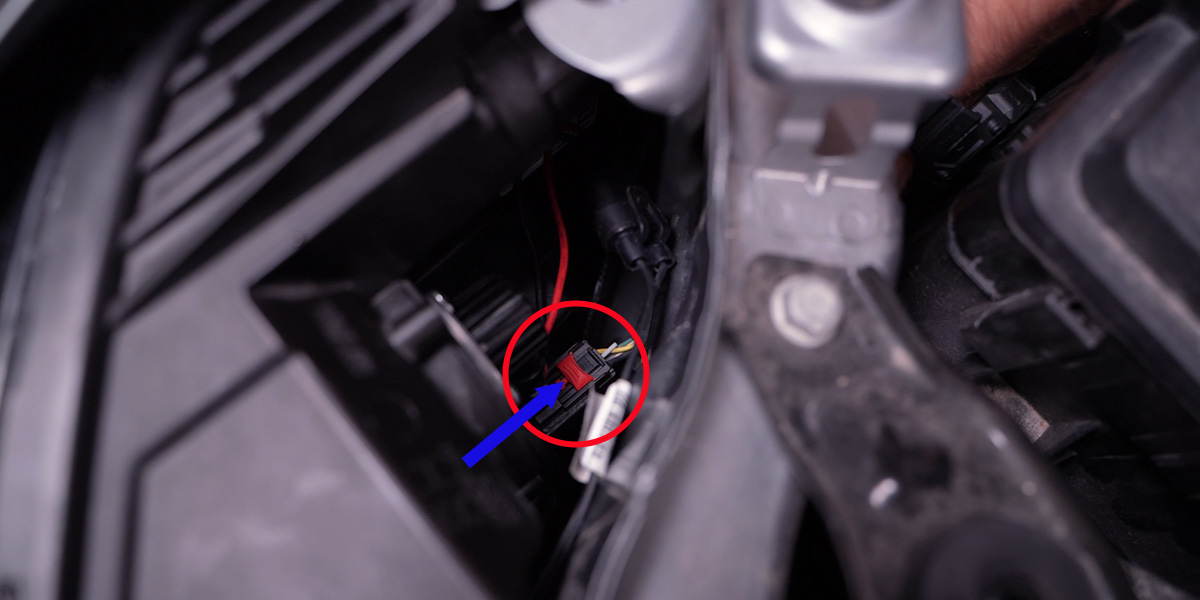
Access the connector through the gap shown below. Pull the red locking pin towards the back of the connector to unlock (blue arrow). Press the locking tab while pulling the connector away from the headlight to remove it.
Pull the passenger headlight connector up to the top of the headlight and cut away an inch of the wire loom to better access the wires.
-Install one T-Tap on Green Wire (Parking Light). Once the wire is in place, use needle nose pliers to lock the T-Tap around the wire.
-Install one T-Tap on Yellow Wire (Low Beam). Once the wire is in place, use needle nose pliers to lock the T-Tap around the wire.
-Install one T-Tap on White Wire (High Beam). Once the wire is in place, use needle nose pliers to lock the T-Tap around the wire.
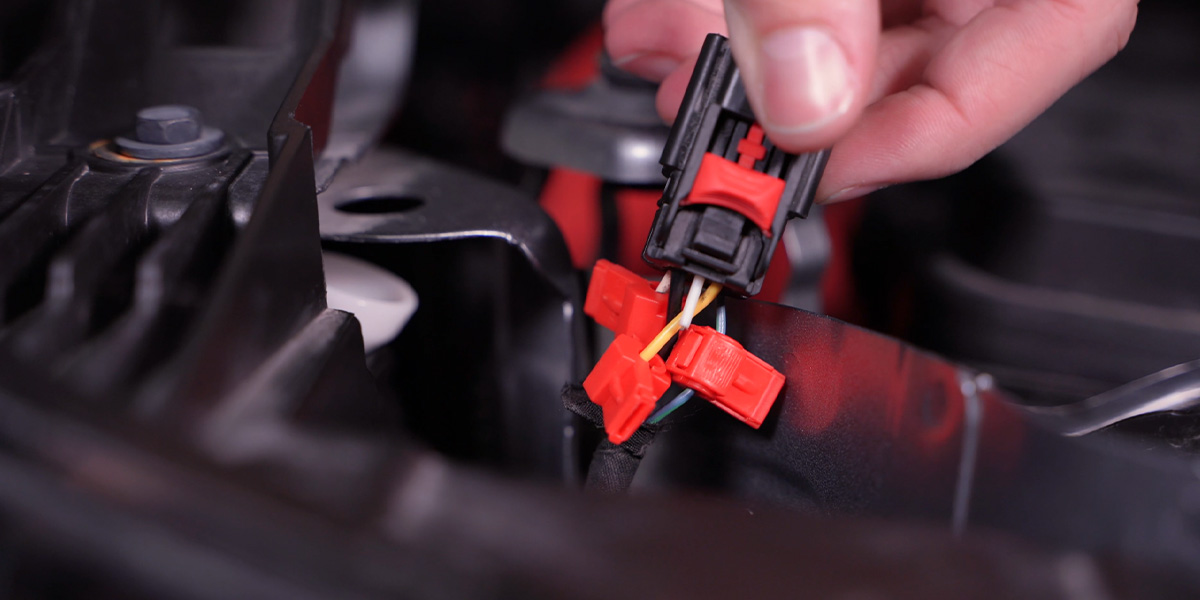
-Connect the white wired activation lead to the T-Tap on the yellow wire (Low Beam)
-Connect the blue wired backlight activation lead to the T-Tap on the green wire (Parking Light)
-Connect the orange wired deactivation lead to the T-Tap on the white wire (High Beam). Once done, reconnect the headlight connector to the back of the headlight.
Step 8 - Route DT Harness
Route the shorter DT harness lead down behind the passenger headlight. Drop it down to the fog area.
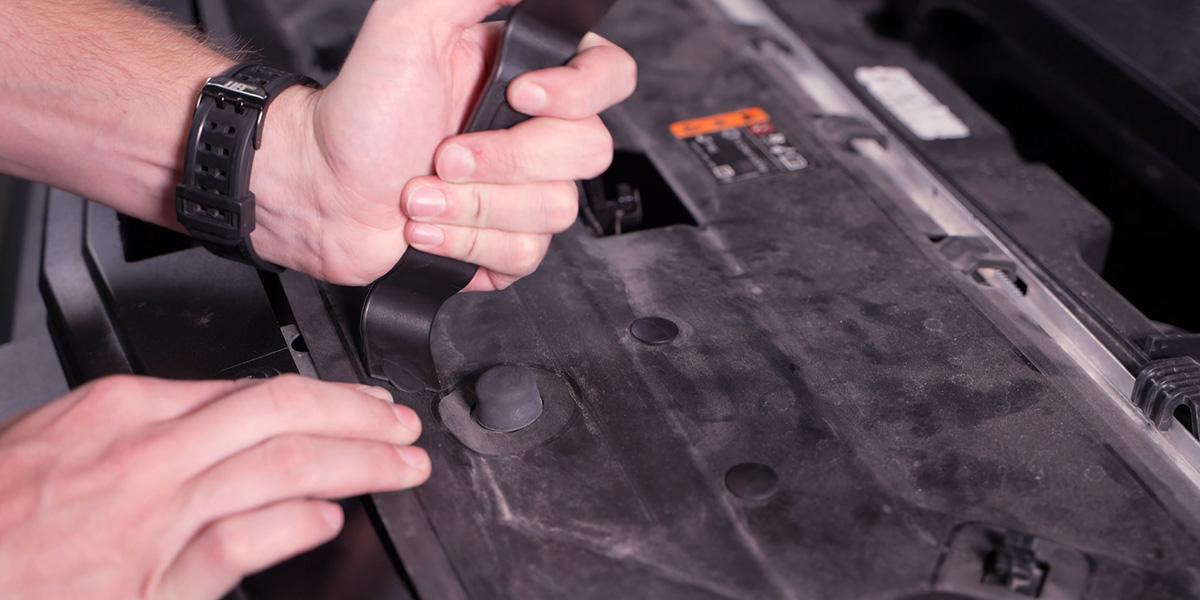
Remove two (2) tree clips on the front of the radiator cover. Route the longer DT harness lead under the radiator cover.
Drop the longer DT connector down to the fog area through the gap behind the driver's headlight.
Plug in the DT connectors to the fogs on both sides ensuring you hear the click of the lock engaging.
Step 9 - Test Functionality
Test SSC1 functions to ensure the wiring is correct.
-Parking Lights = Backlights
-Low Beams = Fog Lights
-High Beams = Fog Lights off
If your lights are not functioning as shown above, double-check activation, backlight, and deactivation wires are connected to the appropriate taps.
Step 10 - Reinstall Fuse Box
Reverse the steps used to take the fuse box off.
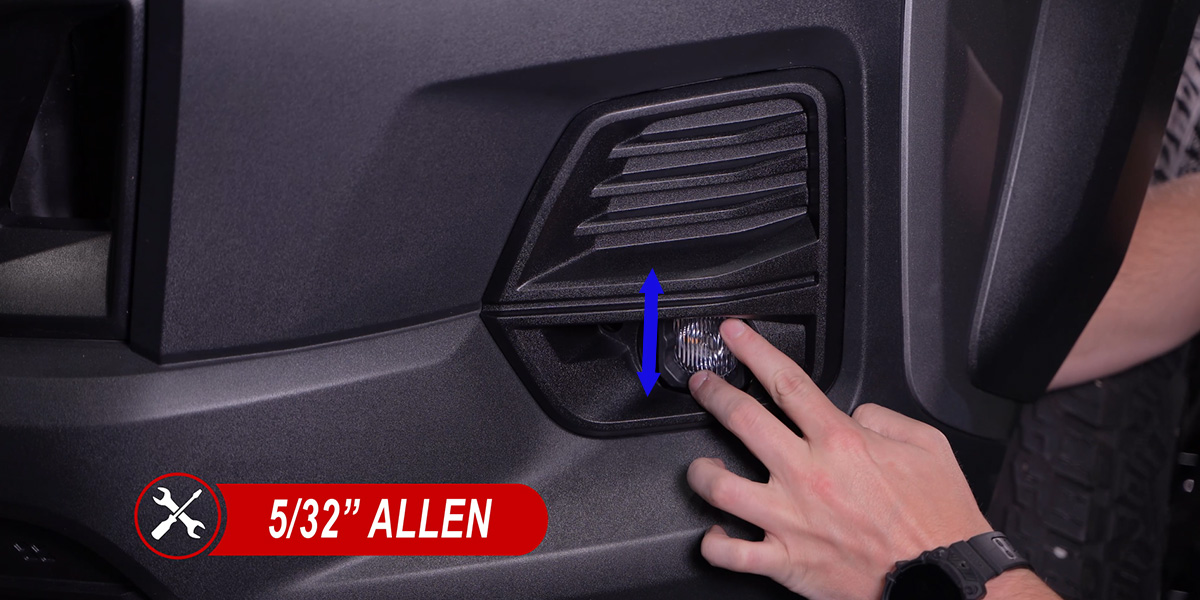
Step 11 - Aim Fog Lights
Following Diode Dynamics Fog Light Aiming Instructions, aim the fog lights for optimized output by adjusting from the opening in the fog bezel.
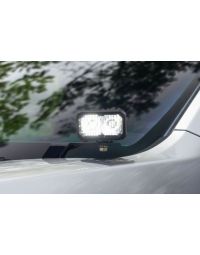
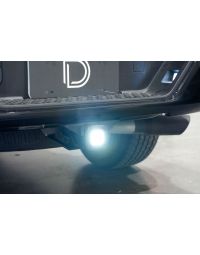
The installation is now complete. Enjoy your SSC1 LED Fog Light Kit For the 2023+ Chevrolet Colorado.
Questions About the Installation?
If you have any questions or issues installing the SSC1 LED Fog Light Kit for the 2023+ Chevrolet Colorado, please contact us for further assistance.
Where Can I Buy an SSC1 LED Fog Light Kit for the 2023+ Chevy Colorado?
If you’re ready to upgrade your 2023+ Chevy Colorado with an SSC1 LED Fog Light Kit, you can purchase one by clicking here or using our dealer locator to find a dealer near you.
If you are looking to add additional Off-Road LED Lights to your Colorado, we have a variety of LED Pod Light kits here!
Want to know more about Diode Dynamics products? Visit DiodeDynamics.com and subscribe to our newsletter for new product releases and more!
This Installation Guide is for the following SKUs: DD7804, DD7805
Share This Post